Mastering Collard Greens: The Irresistible Blend of Bacon, Vinegar, & Tender Perfection
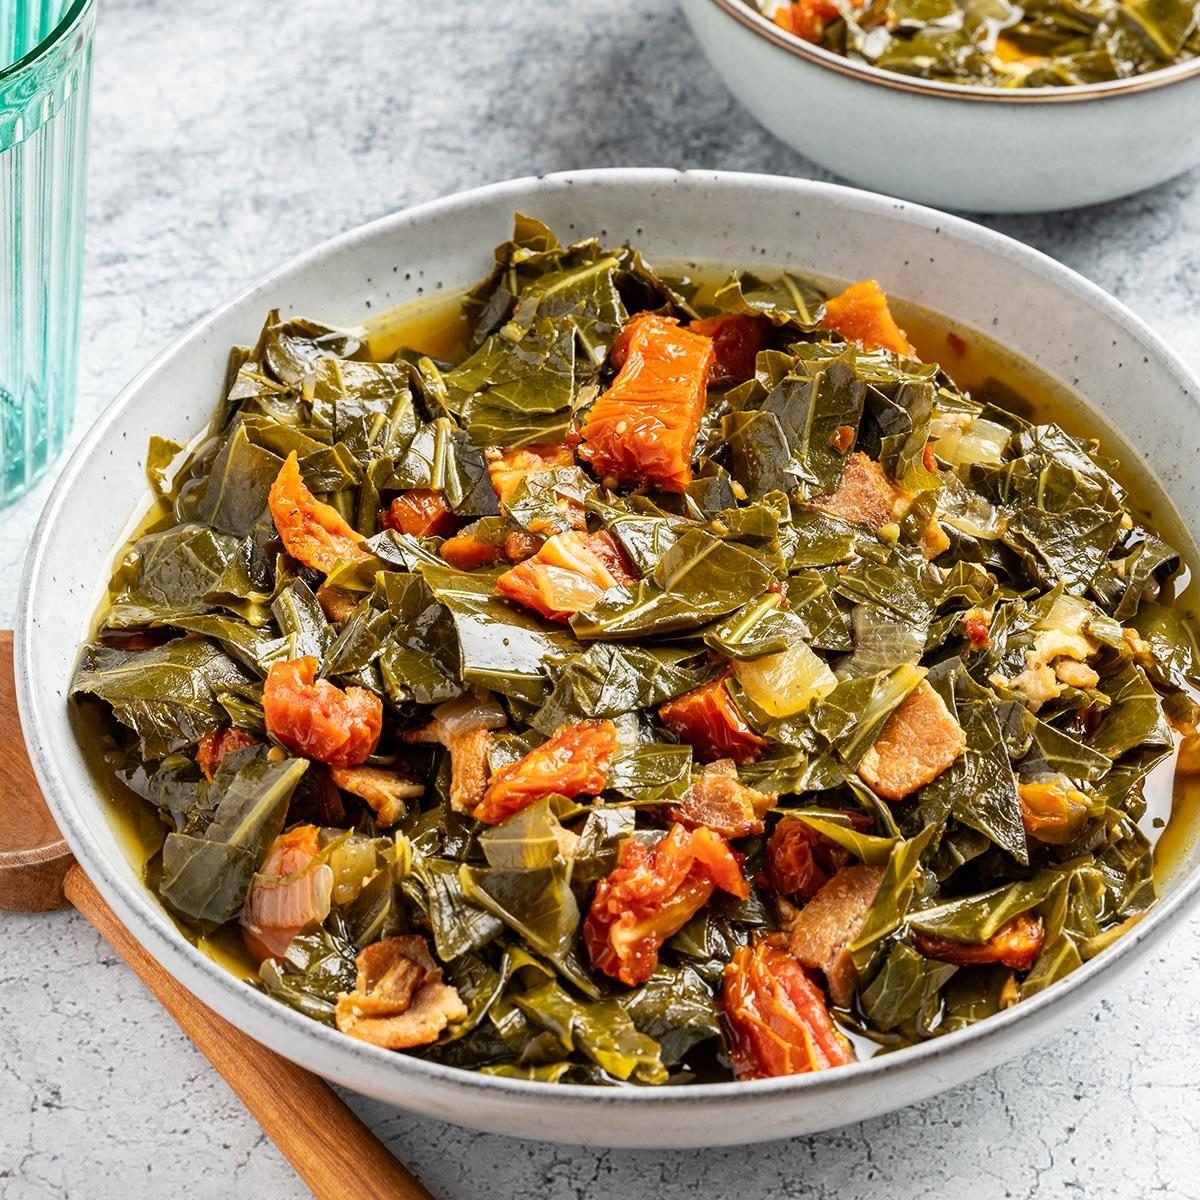
Collard greens, a true cornerstone of Southern cuisine, are often overlooked in the produce aisle, yet they hold the potential for a profoundly comforting and flavorful experience. For those who dismiss them as merely "greens," a revelation awaits. When prepared with the right touch – a smoky foundation of bacon, a bright tang of apple cider vinegar, and the magic of patient simmering – these humble leaves transform into a side dish so rich and tender, it often steals the show. This isn't just a recipe; it's an invitation to unlock the deep, savory satisfaction ofThe Soulful Story of Collard Greens
Often synonymous with Southern comfort and tradition, collard greens boast a history as robust as their flavor. Tracing their name back to the medieval "colewort" (a non-heading type of cabbage), collards have been a garden staple for centuries. In the American South, they've become more than just a vegetable; they're a symbol of heritage, often gracing tables for celebratory occasions like New Year's Day, believed to bring good fortune when paired with black-eyed peas and cornbread. At first glance, collard greens can seem a bit intimidating. Their large, dark green leaves are attached to tough, fibrous stems, and raw, they possess a distinct bitterness and sturdy texture. This is where many might hesitate, but understanding their nature is the first step to mastering them. Unlike their more delicate cousins, collards thrive with a "low and slow" approach. They share characteristics with other sturdy greens like kale, turnip greens, and mustard greens, all benefiting immensely from extended cooking times that break down their tough fibers and mellow their inherent bitterness. The secret to their transformation lies in classic Southern techniques: the savory richness of cured pork and the bright acidity of vinegar, which together cut through any residual bitterness while enhancing their earthy notes.Essential Ingredients for Perfect Collard Greens with Bacon
Crafting a batch of truly exceptional- Collard Greens: The star, of course! When selecting your greens, look for dark green leaves that are crisp and vibrant, free from yellowing, brown spots, or wilting. Avoid any that feel slimy or overly soft. You can buy them in bundles or, to save time, opt for pre-washed and chopped bags.
- Bacon: This is the backbone of the dish. Thick-cut, smoky bacon renders fat that becomes the cooking medium and infuses the greens with an incomparable savory depth. Don't skimp on quality here; good bacon makes a significant difference.
- Onion & Garlic: The aromatic foundation. These humble vegetables are sautéed in the bacon grease, creating a sweet and pungent base that elevates the entire dish.
- Chicken Broth: This liquid gold is crucial for simmering the greens until they are wonderfully tender. It also forms the delicious "pot liquor" – the flavorful broth left at the bottom of the pot, perfect for soaking up with cornbread.
- Apple Cider Vinegar: The unsung hero! The acidity of apple cider vinegar is what brilliantly balances the greens' earthiness and cuts through any lingering bitterness, adding a bright, tangy finish that is simply irresistible.
- Hot Sauce: (Optional, but highly recommended) A splash of your favorite hot sauce, like Tabasco or a Louisiana-style pepper sauce, adds a gentle warmth and a layer of complexity without making the dish overtly spicy.
- Salt & Black Pepper: Essential seasonings to enhance all the other flavors. Taste as you go and adjust to your preference.
Step-by-Step: Crafting Tender Collard Greens with Bacon
The journey to perfectly tender and flavorful1. Meticulous Preparation of the Greens
This is arguably the most critical step to ensure a delightful eating experience. Collard greens, grown close to the ground, can harbor a lot of dirt and grit. Begin by cleaning them thoroughly under cold running water, leaf by leaf. You might even want to soak them for a few minutes and then rinse again. Next, lay each leaf flat and use a sharp knife to carefully cut out the tough, woody stem that runs down the center. You want to remove as much of the thick stem as possible, leaving only the tender leaf. Once cleaned and destemmed, stack the leaves and roll them into a tight cigar shape, then roughly chop them into uniform pieces, about 1 to 2 inches wide. Uniformity ensures even cooking. Southern Collard Greens: Make Them Tender, Not Bitter emphasizes the importance of proper cleaning and chopping for optimal results.
Pro Tip: You can prep your greens up to three days in advance, storing them in a sealed bag in the refrigerator, making meal prep a breeze!
2. Building the Flavor Foundation
In a large, heavy-bottomed pot or Dutch oven, cook your diced bacon over medium heat until it's wonderfully crispy. This rendering process extracts the flavorful fat that will infuse your greens. Once crisp, remove about half of the bacon bits and set them aside for garnish – this adds a delightful textural contrast later. Into the remaining bacon grease in the pot, add your chopped onion and cook until it softens and becomes translucent, about 5-7 minutes. Then, stir in the minced garlic and cook for another minute until fragrant, being careful not to burn it.
3. Simmering to Perfection
Now, it's time to introduce the greens. They will look like a mountain at first, but they will cook down significantly. Add the chopped collard greens to the pot, along with the chicken broth, a pinch of salt, and a good grind of black pepper. Stir everything together. Bring the mixture to a gentle simmer, then reduce the heat to low, cover the pot, and let them cook. This "low and slow" simmer is key to achieving that melt-in-your-mouth tenderness. Cooking time can vary, but expect anywhere from 1 to 2 hours, or even longer, until the greens are incredibly soft and the bitterness has completely disappeared. Stir occasionally to ensure even cooking.
4. The Finishing Touches
Once the greens are tender to your liking, remove them from the heat. Stir in the apple cider vinegar and a dash or two of hot sauce (if using). Taste and adjust seasonings – you might need a little more salt, pepper, or even a touch more vinegar for brightness. The vinegar is crucial for balancing the richness and cutting through any remaining bitterness. Ladle the hot
Serving Suggestions & Expert Tips
Once you’ve mastered the art of tender, flavorful collard greens, you’ll find they are an incredibly versatile side dish. Easy Collard Greens with Bacon: Smoky, Savory Side Dish highlights just how adaptable this dish can be.Perfect Pairings:
- Cornbread: This is a non-negotiable classic pairing. The sweet, crumbly texture of cornbread is ideal for soaking up the delicious "pot liquor" left behind in the collard greens.
- Hoppin' John: Another Southern New Year's Day tradition, the smoky greens complement the black-eyed peas and rice perfectly.
- Roasted or Fried Chicken: The rich, savory greens provide a wonderful contrast to crispy chicken.
- BBQ & Smoked Meats: Whether it's slow cooker ribs, pulled pork, or brisket, collard greens are a natural accompaniment, cutting through the richness of the meat.
- Cajun Turkey or Ham: Especially during holidays, these greens are the perfect counterpoint to a flavorful main course.
Troubleshooting & Tips:
- Still Bitter? If your greens retain a bitter edge, don't despair! Add another splash of apple cider vinegar, or even a pinch of sugar, which can help mellow the bitterness. Longer simmering also helps considerably.
- Not Tender Enough? Simply keep simmering! Tough collards are undercooked collards. Some varieties or older greens may just need more time.
- Enhance the Pot Liquor: That flavorful broth is a treasure! Serve it alongside the greens, encouraging diners to enjoy every drop with their cornbread.
- Storage: Cooked collard greens will stay fresh in an airtight container in the refrigerator for up to 3 days.
- Freezing: While technically possible, freezing is generally not recommended for collard greens. Upon thawing, they tend to become watery and mushy, losing their desirable texture. It's best to enjoy them fresh or within a few days of cooking.
